This is part 2 of our tutorial Deploying Websites with Continua CI. This tutorial steps you through the best practice for deploying your web application. It is highly recommended that you complete Part 1: Create a Web Application before continuing on with this tutorial.
Transform Your Web.Config
As you deploy your website to various production servers, inevitably you will be required to have different versions of your web.config that contain different credentials, connection strings, etc. In the old days of web deployment, you would be required to either:
- Store a different version of your web.config on each of your production servers and ensure that this web.config was never overwritten, deleted, etc.
- Copy over the web.config during the deploy and manually change individual properties.
Both of these methods are extremely error prone and a simple typo can bring down your entire website. There is a better solution which uses Web.Config transforms.
Web.Config transforms modify your web.config file depending on which Solution Configuration is selected when your website is built. This means that when you build your website in debug mode, the website will contain your debug web.config and building your website with a production Solution Configuration will create your website with your production web.config.
In this tutorial we will create a new Solution Configuration called production which we will then use from Continua when we are deploying our website.
Creating a Production Solution Configuration
In your ContinuaDeployTutorial website, open up the configuration manager and select <New...> from the Active solution configuration dropdown (as shown in the images below).

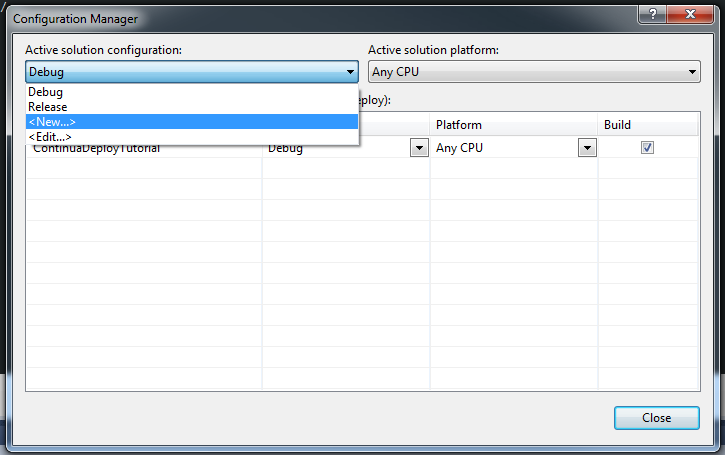
Clicking <New...> will open up the New Solution Configuration dialog. This dialog allows us to create a new Solution Configuration which we can use when deploying to our production server. Lets call our new Solution Configuration Production and lets copy the settings from our existing Debug Solution Configuration and make sure that Create new project configurations is checked. (as shown below).
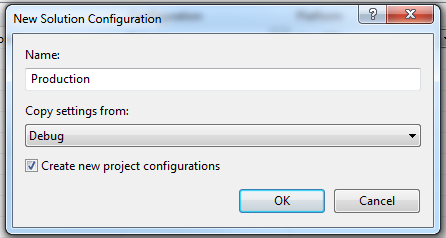
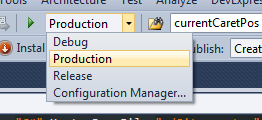
Once our Production Solution Configuration has been saved, you should now see it appear in the Solution Configuration dropdown.
Creating a Production Web.Config Transform
Now that we have created our Production Solution Configuration, we will need create a Web.Config Transform for our Production Solution Configuration. In your ContinuaDeployTutorial, expand your Web.Config file and you should see a Web.Debug.config and a Web.Release.config file.

These config files are linked to your Solution Configurations and the config file that is used to build your web app changes depending on which Solution Configuration is selected. So if you compile your project using the Debug Solution Configuration then the Web.Debug.config file is used.
Now that we have a production Solution Configuration, we need to add a Web.Production.config file to our web app. Right click Web.config and select Add Config Transforms.
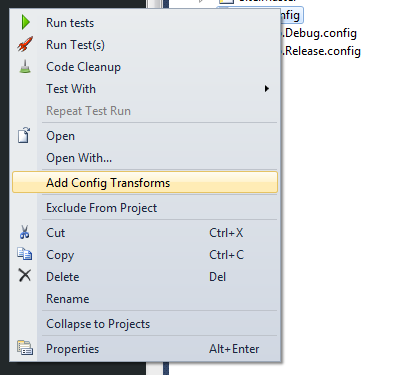
This will add a new production config transform called Web.Production.config (as shown below). This command actually creates a new config transform for each Solution Configuration that exists within your project.

Modifying the Web.Config and Working with Web.Config Transforms
Even though we now have 3 separate Web.Config transform files, there is still only one main config file that will need to be maintained during development. The main Web.Config file still contains all the config information for your web app, however these Web.Config transforms change certain values depending on which Solution Configuration is being used at run time. It is important to note that the main Web.Config file should be configured to work on your local development machine. Any changes that occur through our Web.Config transforms will only occur when we publish our web app. So options like connection strings should point to your local development databases and any other appSettings should also point to locations on your local development machine.
To show how transforms work, lets replace the existing connectionString in our Web.Config to the following:
<connectionStrings>
  <add name="MySQLDB" connectionString="Data Source=(local);Initial
    Catalog=AutoDeploy;User ID=development_user;Password=password"/>
</connectionStrings>
Now that we have defined a connectionString that points to our local db, lets add a connectionString transform to our Web.Production.config. The entire Web.Production.config file should look like this:
<?xml version="1.0"?>
<configuration xmlns:xdt="http://schemas.microsoft.com/XML-Document-Transform">
  <connectionStrings>
    <add xdt:Transform="SetAttributes" xdt:Locator="Match(name)"
      name="MySQLDB" connectionString="Data Source=My_Production_Server;Initial
      Catalog=AutoDeploy;User ID=production_user;Password=production_password" />
  </connectionStrings>
  <system.web>
    <compilation xdt:Transform="RemoveAttributes(debug)" />
  </system.web>
</configuration>
You should notice that Web.Production.config is not a full config file but instead it only contains the config values that we wish to change for the production environment.
Testing your Production Web.Config
Now that we have our Web.Production.config transforming the connection string, we should test our web app to make sure that our Production Config is indeed overwriting the default web.config. So lets publish our web app using the Production Solution Configuration.
Make sure your web app has the Production Solution Configuration selected but do not build the solution. Instead, right click the ContinuaDeployTutorial project and select Publish (as shown below).
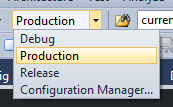
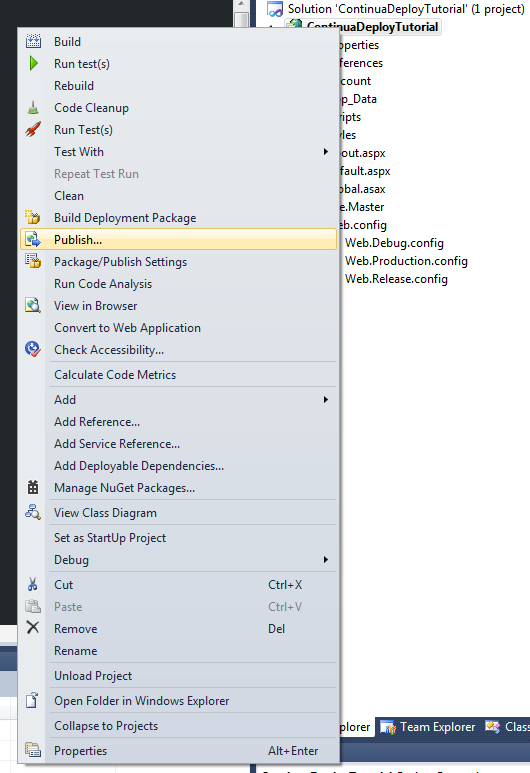
When publishing your web app, set the publish method to File System and set target location to the directory where the web app should be published (as shown below).
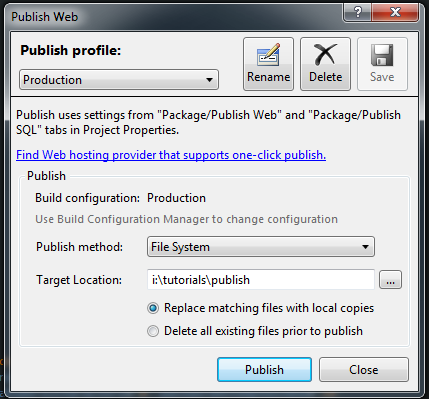
Once the publish has completed successfully, navigate to the target location using windows explorer and find the web.config file that was published. Open the web.config using notepad. If the config contains your production connection string then you have correctly setup your Web.Config Transforms.
Building your Web App with Continua
Now that our web.config values are dynamic when publishing, lets get Continua building and deploying our Web App.