Create Azure App Service Plan Action
This action is a wrapper for the Azure command line: az appservice plan create. If you're having trouble using this action, or any of the Azure actions, please refer to the Azure command line reference.
The Create Azure App Service Plan action is a premium action that can be used to create an App Service plan on Azure. An App Service plan defines a set of compute resources for a web app to run. These compute resources are analogous to the server farm in conventional web hosting. One or more apps can be configured to run on the same computing resources (or in the same App Service plan).
Before creating an App Service plan, you will need a Resource Group. See also the Delete Azure App Service Plan Action.
Create Azure App Service Plan
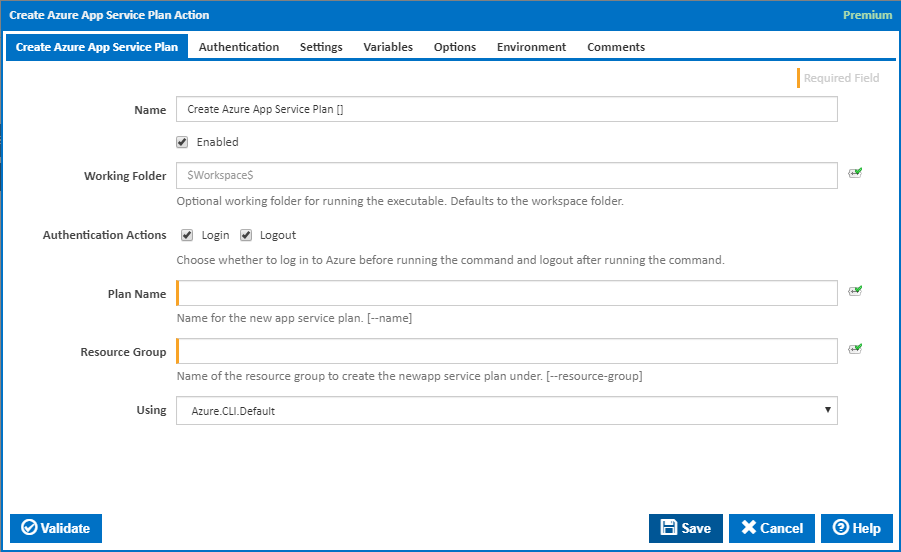
Name
A friendly name for this action (will be displayed in the actions workflow area).
Enabled
Determines if this action will be run within the relevant stage.
Working Folder
The folder where the command line executable is run. This is optional and defaults to the workspace folder.
Authentication Actions
Generally you will need to log in to Azure before running this action and log out afterwards. If you have several Azure actions in a stage, you can avoid repeated logins by unchecking the Login action on all but the first Azure action and unchecking the Logout action on all but the last Azure action. The Authentication tab will be shown if either of these options is ticked.
Plan Name
The name of the new app service plan. This can include alphanumeric characters and hyphens but no spaces. [---name]
Resource Group
The name of the existing resource group to create the new app service plan under. [---resource-group]
Using
The version of the Azure command line to use. It is important that the agent has the correct version of the Azure command line installed for command provided.
The Using drop down is populated with any property collector whose namespace matches the pattern defined by the Create Azure Resource Group action. The pattern for this action is ^Azure.Cli.*
If you create a property collector for this action, make sure you select the Path Finder PlugIn type and give it a name that will match the pattern above in blue. Example names listed here, search the table's Plugin column for "Azure Command".
For more in-depth explanations on property collectors see Property Collectors.
Alternatively, you can select the Custom option from the Using drop down list and specify a path in the resulting input field that will be displayed. Please read Why it's a good idea to use a property collector before using this option.
Authentication
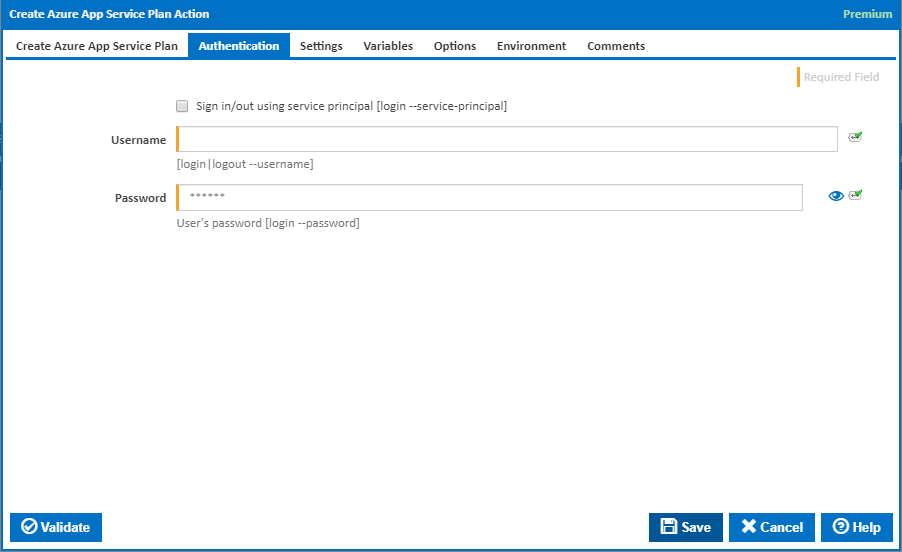
Sign in/out using service principal
Tick this to log in or out using a service principal instead of a username and password. An Azure service principal is an identity created for use with applications, hosted services, and automated tools to access Azure resources. This access is restricted by the roles assigned to the service principal, giving you control over which resources can be accessed and at which level. For security reasons, it's always recommended to use service principals with automated tools rather than allowing them to log in with a user identity. [login --service-principal]
Username
Enter a username to log into the Azure cloud. This is generally an email address. [login|logout --username]
Password
The password associated with the Azure username. [login --username]

Name or URL
Enter the application name or the URL associated with the service principal. [login --service-principal --username]
Client Secret or Certificate
Enter the service principal password, or the path to a X509 certificate used to create the service principal in PEM format. [login --service-principal --password]
Tenant
Enter the tenant associated with the service principal, as either an .onmicrosoft.com domain or Azure object ID. [login --service-principal --tenant]
Use certificate SN issuer
Tick to support automatic certificate rollovers with service principals configured with Subject Name and Issuer Authentication. [login --use-cert-sn-issuer]
Settings
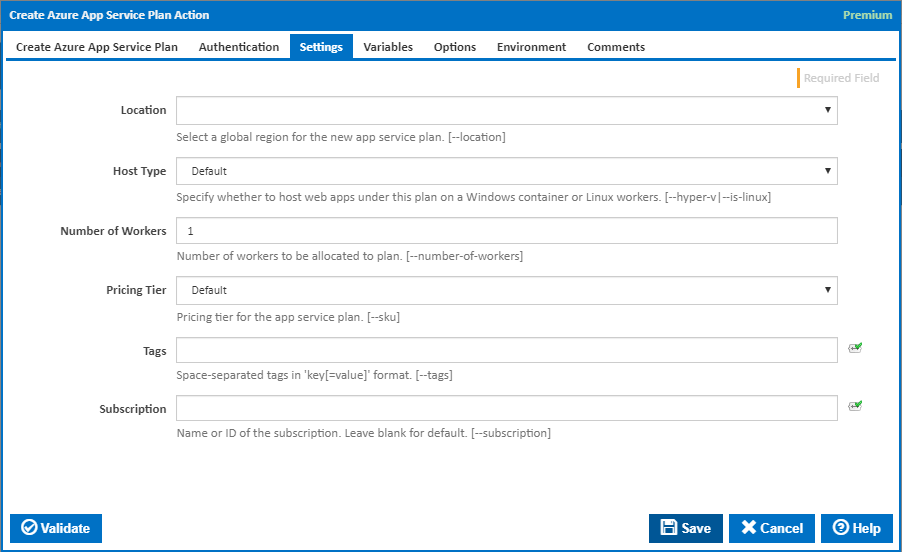
Location
Select a global region for the new app service plan. [---location]
Host Type
Specify whether to host web apps under this plan on a Windows container or Linux workers. [---hyper-v|--is-linux]
Number of Workers
The number of workers to be allocated to plan. [---number-of-workers]
Pricing Tier
The pricing tier for the app service plan. [---sku]
Custom Pricing Tier
This field is visible when the Pricing Tier is set to 'Custom'.
State the pricing tier. The list of accepted values can be found here.
Tags
Space-separated tags in 'key[=value]' format. [---tags]
Subscription
The name or ID of the subscription to use. If omitted the default subscription for your environment will be used. [---subscription]
Variables
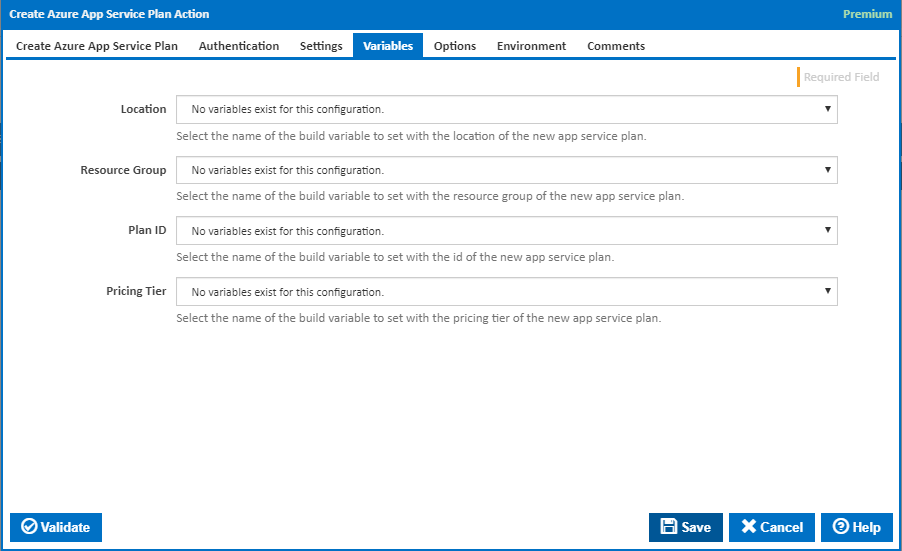
Location
Select the name of the build variable to set with the location of the new app service plan.
Resource Group
Select the name of the build variable to set with the resource group of the new app service plan.
Plan ID
Select the name of the build variable to set with the id of the new app service plan.
Pricing Tier
Select the name of the build variable to set with the pricing tier of the new app service plan.
Options
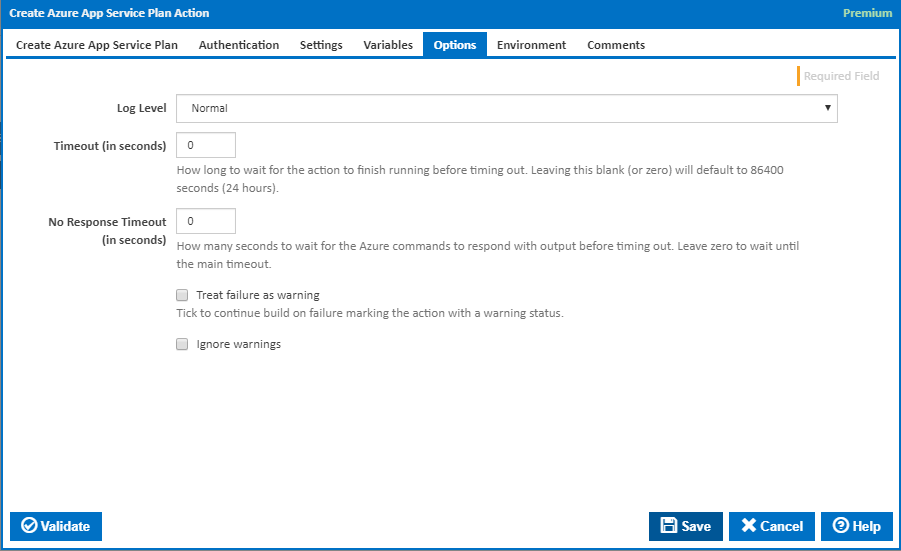
Log Level
The amount of information detail to display in the build log.
Timeout (in seconds)
How long to wait for the action to finish running before timing out. Leaving this blank (or zero) will default to 86400 seconds (24 hours).
No Response Timeout (in seconds)
How many seconds to wait for the Azure commands to respond with output before timing out. Leave zero to wait until the main timeout.
Treat failure as warning
Tick to continue build on failure marking the action with a warning status.
Ignore warnings
If this is ticked, any warnings logged will not mark the action with a warning status.
Environment
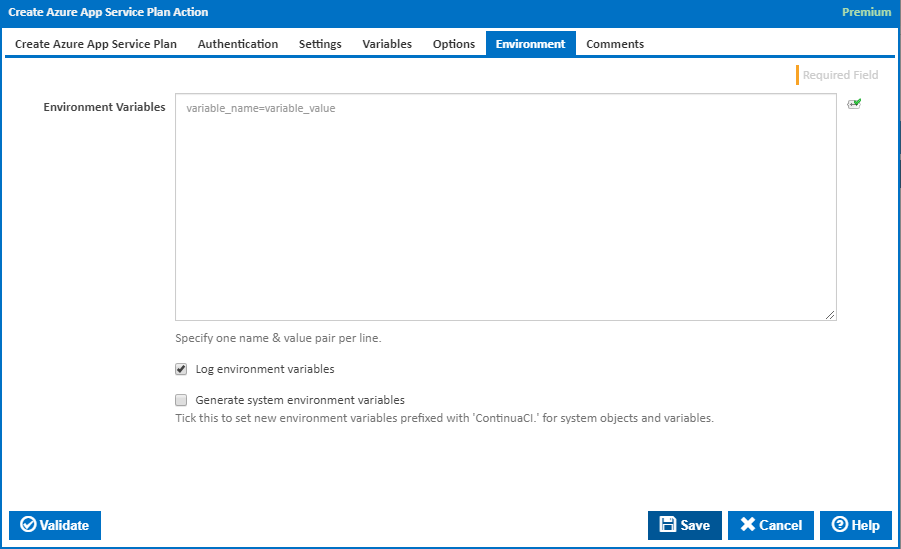
Environment Variables
Multiple environment variables can be defined - one per line. These are set before the command line is run.
Log environment variables
If this is ticked, environment variable values are written to the build log.
Generate system environment variables
Tick this checkbox to set up a list of new environment variables prefixed with 'ContinuaCI.' for all current system expression objects and variables.
Mask sensitive variable values in system environment variables
This checkbox is visible only if the 'Generate system environment variables' checkbox is ticked.
If this is ticked, the values of any variables marked as sensitive will be masked with **** when setting system environment variables. Clear this to expose the values.