NPM Install Action
The NPM actions in Continua are a wrapper around the npm command line. If you're having trouble using any of the NPM actions, please refer to the Command Line Reference.
The NPM Install action is used to install NPM packages to the workspace.
NPM Install
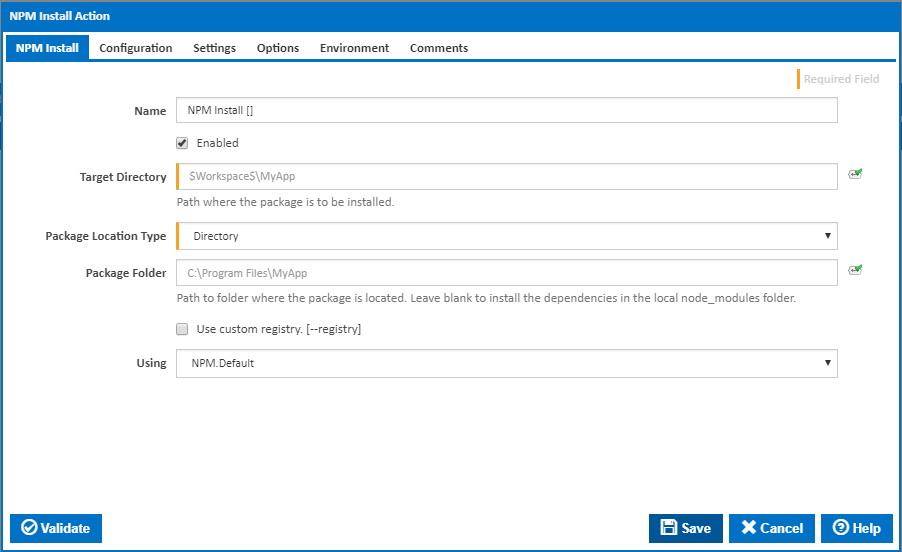
Name
A friendly name for this action (will be displayed in the actions workflow area).
Enabled
Determines if this action will be run within the relevant stage.
Target Directory
Where to install the package. Relative paths will be anchored to the workspace folder.
Package Location Type
The type of package location. This can be a directory, file, URL or definition which describes the location of the package.
Directory
Package Folder
Enter the path to the folder which contains the package.json file describing the installation.
File
Package File
Enter the path to a gzipped tarball containing the NPM package to install.
URL
Package URL
Enter the URL to a gzipped tarball or Git repository containing the NPM package to install. You can enter a HTTP or HTTPS URL or one of the following special URL formats for accessing Git repositories.
<protocol>://[<user>[:<password>]@]<hostname>[:<port>][:/]<path>[#<commit-ish>]where protocol is one ofgit,git+ssh,git+http, orgit+https<githubname>/<githubrepo>[#<commit-ish>]orgithub:<githubname>/<githubrepo>[#<commit-ish>]for installing packages from github.com repositoriesgist:[<githubname>/]<gistID>[#<commit-ish>]for installing packages uploaded to gist.github.combitbucket:<bitbucketname>/<bitbucketrepo>[#<commit-ish>]for installing packages from bitbucket.org repositoriesgitlab:<gitlabname>/<gitlabrepo>[#<commit-ish>]for installing packages from gitlab.com repositories
where <commit-ish> indicates a commit hash, branch or tag name. This defaults to master.
Definition
Package Definition
Enter the name of a package that is published on the official NPM registry. You can also optionally specify the scope, tag or version using the following formats:
[@<scope>/]<name>[@<scope>/]<name>@<tag>[@<scope>/]<name>@<version>[@<scope>/]<name>@<version range>
You can also specify multiple package definitions separated with a space.
Save as dependency
Tick this to save the package name and version to your package dependencies.
Dependency Location
Where to save the package dependency. Select "Save in dependencies" [---save], "Save in dev dependencies" [---save-dev] or "Save in optional dependencies" [---save-optional] to save under the dependencies, devDependencies or optionalDependencies node in the package.json file.
Save exact
Tick this to save the dependency using the exact version rather than using NPM's default semver range operator. [---save-exact]
Use custom registry
Tick to open a new Registry tab to specify a custom NPM registry rather than the default registry of NPM. [---registry=]
Using
The Using drop down is populated with any property collector whose namespace matches the pattern defined by the NPM Install action. The pattern for this action is ^NPM.*
If you create a property collector for this action, make sure you select the Path Finder PlugIn type and give it a name that will match the pattern above in blue. Example names listed here, search the table's Plugin column for "NPM Install".
For more in-depth explanations on property collectors see Property Collectors.
Alternatively, you can select the Custom option from the Using drop down list and specify a path in the resulting input field that will be displayed. Please read Why it's a good idea to use a property collector before using this option.
Registry
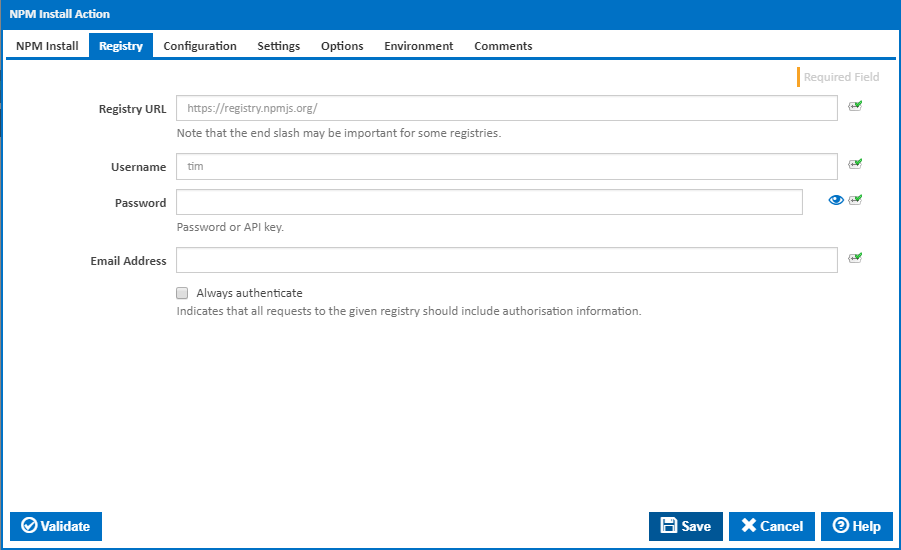
Registry URL
The full URL end-point of the registry to use. The registry in question will be logged into before the action is run, and then logged out of when the action has completed.
Username
The username of the user with credentials to access the registry entered above. Note that the user should have permission to perform the action in question - whether that be publishing or downloading packages.
Password
The password for the username listed above. Note that some registries allow for either a user password, or feed specific API key to be used when logging into the registry. The password in question will be written to the project specific NPM configuration file and removed after the action has been completed. It is advised to use a user with access limited to the tasks performed by this action.
Email Address
The email address of the user accessing the registry. For publishing, this is the user to whom the published package will be associated with.
Always Authenticate
Indicates that all requests to the given registry should include authorisation information.
Configuration
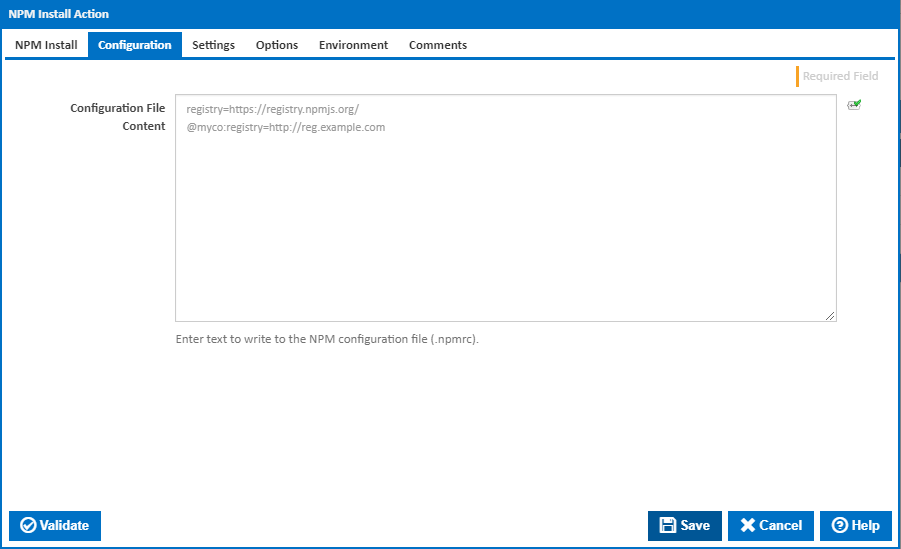
Configuration File Content
Allows for setting any configuration option for NPM. This is useful for defining registry scopes or any specific system settings that are required for NPM. For information on what options are available and the values that they support please refer to the npmrc help.
The configuration file that is written is project specific and will be saved to the target directory specified in the action. This will override any other options specified in the user, and system NPM configuration files on the agent.
Settings

Prefer tagged versions
Tick this to apply the --tag argument to multiple install definitions. If a tag with the given name exists, the tagged version is preferred over newer versions.
Force remote fetch
Force NPM to fetch remote resources even if a local copy exists on disk. [---force]
Install optional dependencies
Clear this to use --no-optional argument to prevent optional dependencies from being installed.
Ignore ShrinkWrap file
Ignore an available ShrinkWrap file and use the package.json instead. [---no-shrinkwrap]
Node Source Code Dirctory
The path to node source code so that NPM can compile native modules.
Options
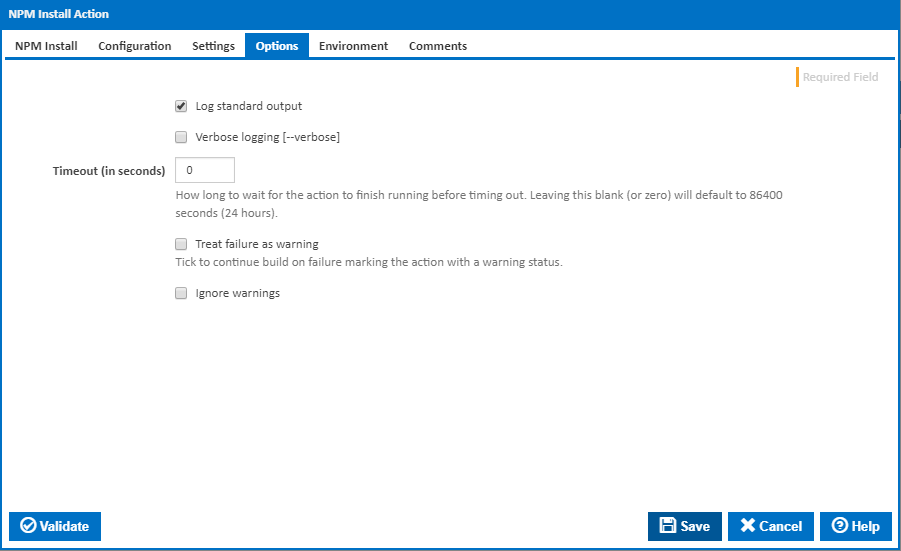
Log standard output
If this is ticked, the command line output is written to the build log.
Verbose logging
Tick this to get more detailed output from the NPM command line. [---verbose]
Timeout (in seconds)
How long to wait for the action to finish running before timing out. Leaving this blank (or zero) will default to 86400 seconds (24 hours).
Treat failure as warning
Tick to continue build on failure marking the action with a warning status.
Ignore warnings
If this is ticked, any warnings logged will not mark the action with a warning status.
Environment
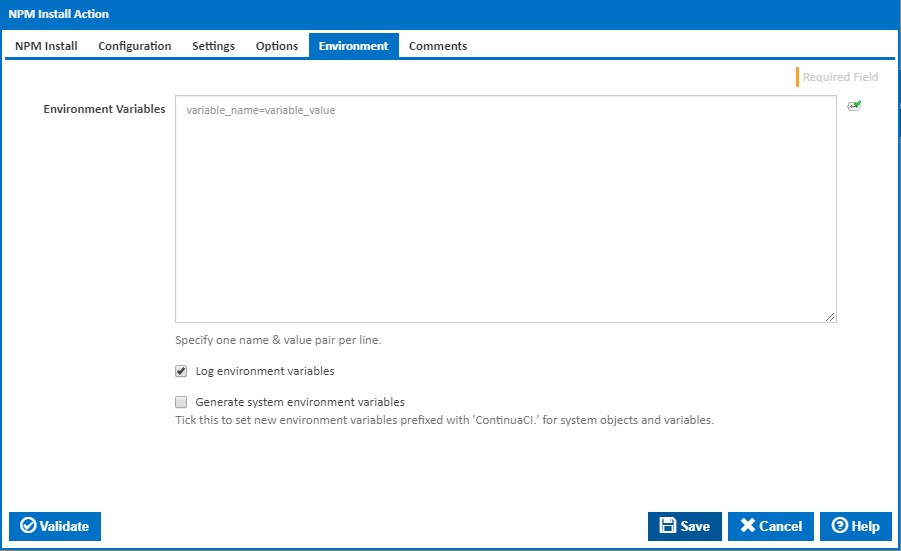
Environment Variables
Multiple environment variables can be defined - one per line. These are set before the command line is run.
Log environment variables
If this is ticked, environment variable values are written to the build log.
Generate system environment variables
Tick this checkbox to set up a list of new environment variables prefixed with 'ContinuaCI.' for all current system expression objects and variables.
Mask sensitive variable values in system environment variables
This checkbox is visible only if the 'Generate system environment variables' checkbox is ticked.
If this is ticked, the values of any variables marked as sensitive will be masked with **** when setting system environment variables. Clear this to expose the values.