GitHub Release
The GitHub Release build event handler can be used to manage GitHub releases. You can create a new release, edit or delete an existing release. You can also upload release assets when create or editing a release. The build event handler can be set to automatically respond to any Build Events.
GitHub Release
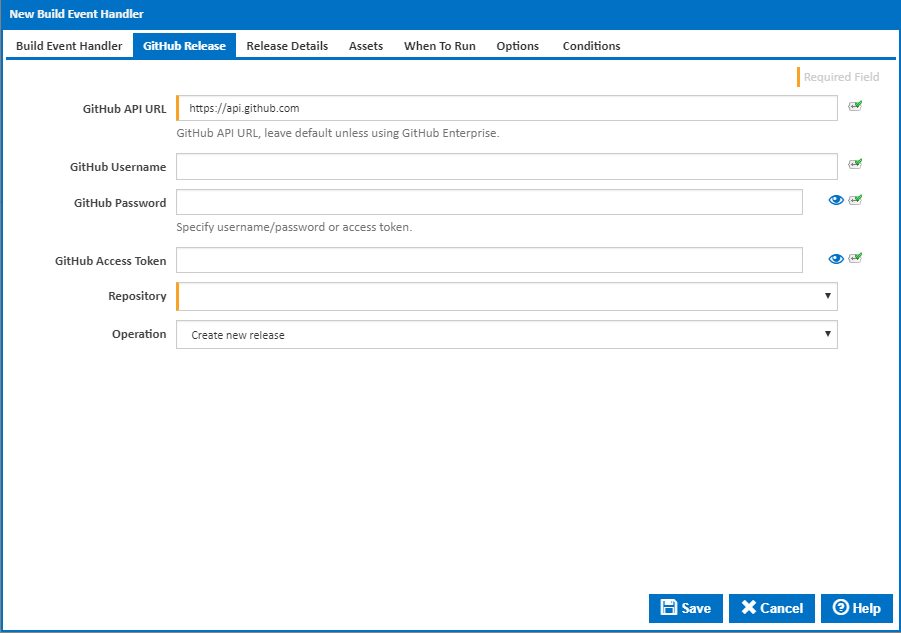
GitHub API Url
The URL of the GitHub API to be used
GitHub Username
The username used to login to GitHub. This should have access to the repository you are managing releases for. Supply either a username and password combination here or an access token below.
GitHub Password
The password used to login to GitHub. This should have access to the repository you are managing releases for.
GitHub Access Token
The personal API access token used to login to GitHub. This should have access to the repository you are managing releases for. Supply either an access token or a username and password combination above.
Repository
Select a GitHub repository from the remote Git repositories associated with the configuration.
Operation
This is one of the following:
- Create new release: A new release will be created with the specified tag name and on the specified target commit. This will fail if the release already exists in the repository..
- Edit existing release: An existing release with the supplied tag name will be updated with the supplied details.This will raise an error if the tag does not exist, unless the "Ignore errors if existing release is not found when deleting or updating. Log warning only" option is ticked.
- Delete existing release: An existing release with the supplied tag name will be deleted. This will raise an error if the tag does not exist, unless the "Ignore errors if existing release is not found when deleting or updating. Log warning only" option is ticked.
Release Details
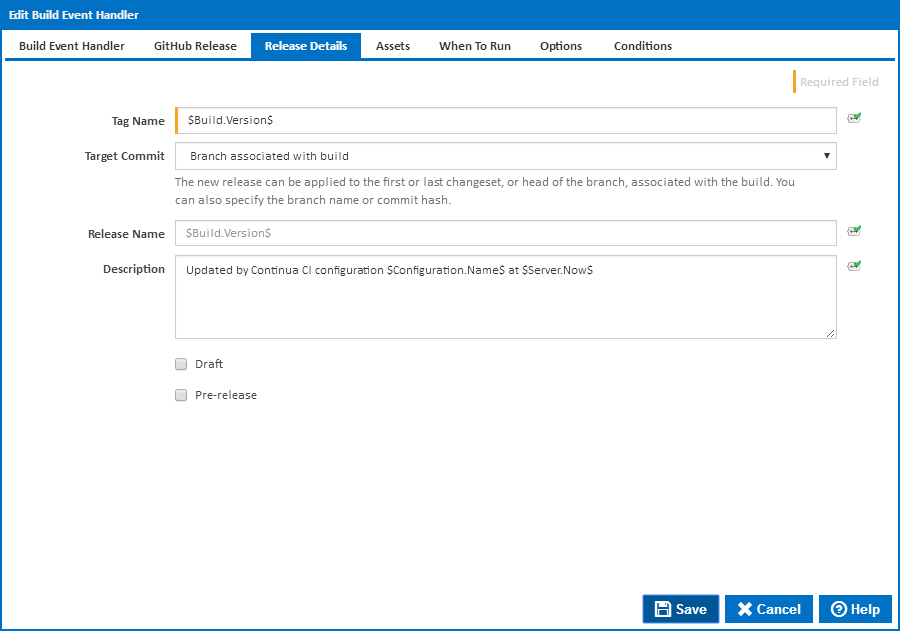
Tag Name
The name of the GitHub tag identifying the release to create, edit or delete. This should be a version number which follows the semantic versioning format rules.
Target Commit
The Git commit to mark as a release. This checkbox is displayed when the "Create new release" operation is selected. The following options are available
Branch associated with build: The release will be created for the head commit of the branch of the repository associated with the current build
First changeset associated with the build: The release will be created for the first changeset commit associated with the current build.
Last changeset associated with the build: The release will be created for the last changeset commit associated with the current build.
Default branch: The release will be created for the head commit of the default branch of the repository as defined in GitHub.
Specific branch or commit: This option causes the Specific Commit Hash or Branch Name field to be displayed.
Specific Commit Hash or Branch Name
The specific commit hash of branch head name to mark as a release.
Release Name
The name or title of the GitHub release. If left empty the tag name is used.
Description
The description of the GitHub release. You can use GitHub markdown tags here.
Draft
Tick this checkbox to save the release as a draft.
Pre-release
Tick this checkbox to flag the release as non-production ready.
Assets
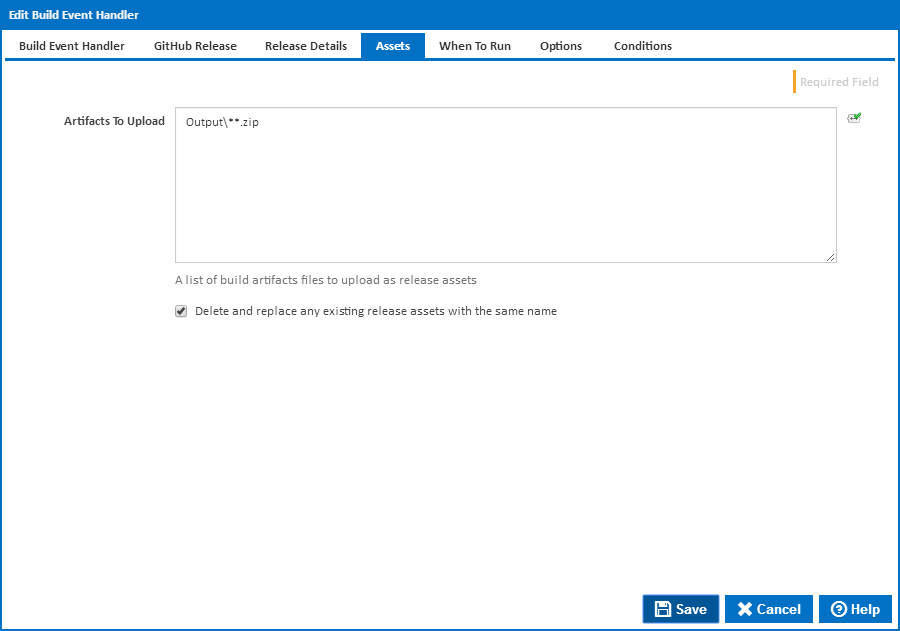
Artifacts to Upload
A list of paths to files to upload from the server workspace. Note that you will need to set up your workspace rules to ensure that the relevant build output files are copied from the agent to the server workspace.Each file/pattern must be entered on a new line. You can specify an exact file with its path or you can use pattern matching. You can exclude files by prefixing the file name or pattern with a dash. e.g -*.ignore. Exclude patterns always take precedence over include patterns. More information about pattern wild cards can be found on the Ant Pattern Usage page.
Delete and replace any existing release assets with the same name
Tick this checkbox to delete any existing release assets with the same name before uploading the new updated assets.
When To Run
You can specify when the build event handler runs by linking it to a Build Event on the When To Run tab.
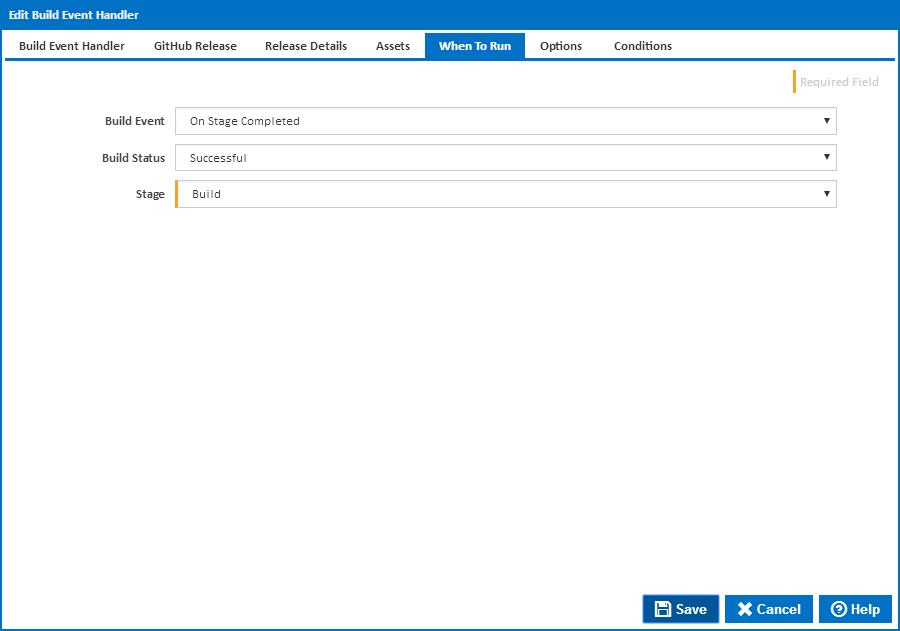
Build Event
Select the event which triggers the tag action. You can choose one of the following Build Events:
- On Build Created
- On Before Build Queued
- On Before Build Start
- On After Build Started
- On Before Stage Start
- On Sending Stage To Agent
- On Stage Completed
- On Build Pending Promotion
- On Before Build Continue
- On After Build Continued
- On Build Stopping
- On Build Completed
Stage
For stage events, select the stage this applies to, or "(all stages)" to trigger the tagging action for all stages
Build Status
For "On Stage Completed" and "On Build Completed", you can choose to trigger the tagging action when the build is Successful or has Failed.
Options
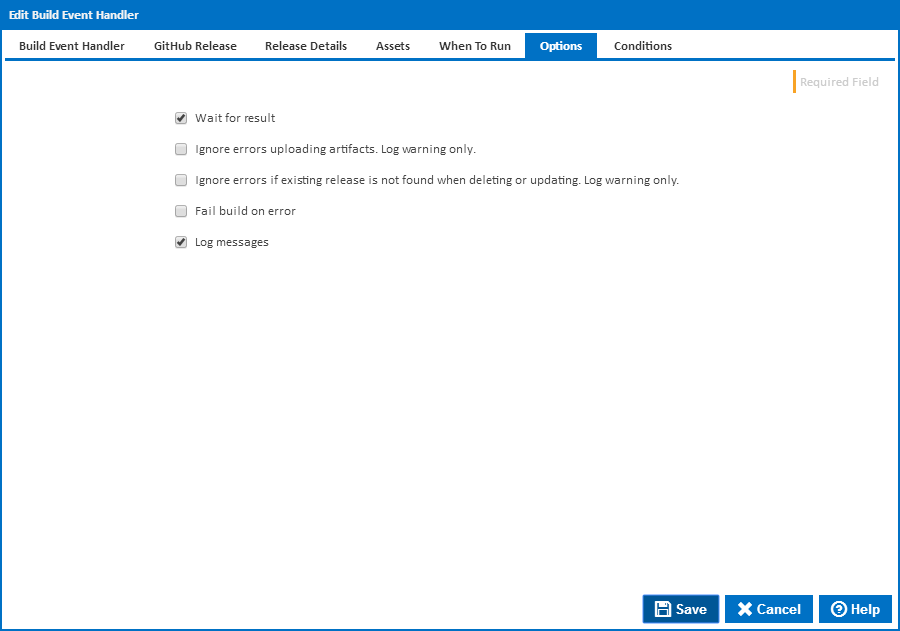
Wait for result
Clear this option to run the tagging action in a separate thread if you don't care about the result eg. whether the action fails or not.
Fail build on error
Tick this to fail the build if the operation returns an error or failure. This is only available if Wait for result is ticked.
Ignore errors uploading artifacts. Log warning only
An error result will be returned if an artifact fails to upload. Tick this option to ignore these errors, only logging a warning to the build log.
Ignore errors if existing release is not found when deleting or updating. Log warning only
An error result will be returned if a release with a matching tag name is not found. Tick this option to ignore these errors, only logging a warning to the build log.
Fail build on error
Tick this to fail the build if the operation returns an error or failure. This is only available if Wait for result is ticked.
Log build messages
When this is ticked, Continua CI will add messages to the build log during execution of the GitHub Release action. Build log messages will only be recorded if Wait for Result is ticked.