Settings
The Settings page in the Admin section of Signotaur allows administrators to configure server settings for Signotaur. These settings are organized into two tabs:
This tab enables administrators to configure the email server settings used by Signotaur for sending verification and password reset emails.

The following inputs are provided:
Email server: The address of the SMTP server.
Email port: The port number used for the SMTP server connection.
Sender email: The email address that appears in the "From" field of outgoing messages.
Sender name: The name displayed in the "From" field.
Secure sockets mode: The type of the SSL and/or TLS encryption that should be used for connecting with the SMTP server.
- No SSL or TLS: No SSL or TLS encryption should be used.
- Automatic: Allow the service to decide which SSL or TLS options to use. If the server does not support SSL or TLS, then the connection will continue without any encryption.
- SSL on connect: The connection should use SSL or TLS encryption immediately.
- Start TLS: Elevates the connection to use TLS encryption immediately after reading the greeting and capabilities of the server. If the server does not support the STARTTLS extension, then the connection will fail and an error will be return.
- Start TLS when available: Elevates the connection to use TLS encryption immediately after reading the greeting and capabilities of the server, but only if the server supports the STARTTLS extension.
Username: The username for authenticating with the SMTP server.
Password: The password for SMTP server authentication.
Once complete, you can test the settings by clicking Send Test Message to send a test email to your address, or click Update to save the settings.
Note that changes to the email settings take effect immediately.
External Authentication
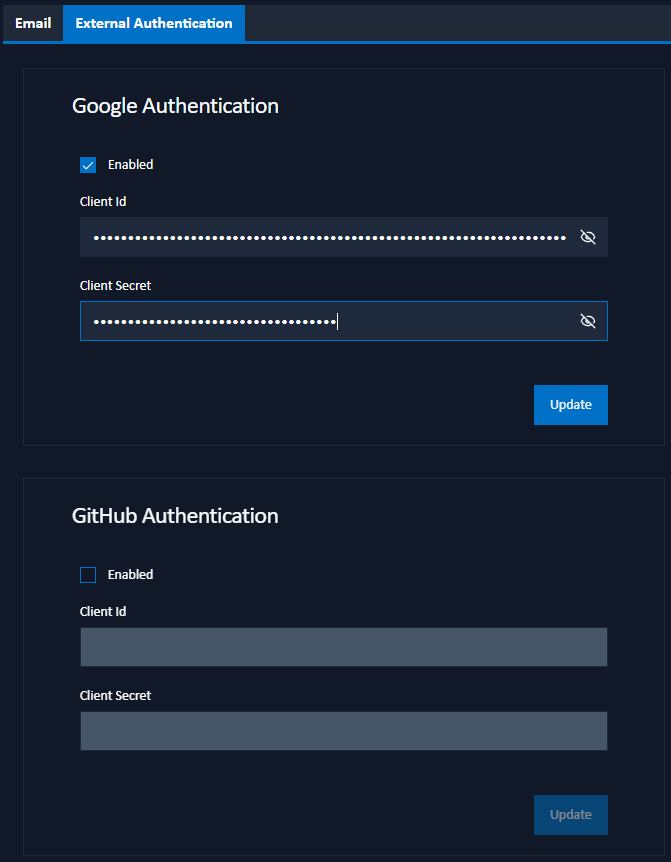
This tab allows administrators to enable external authentication providers for user login. Two options are available: GitHub and Google. For each provider, a Client ID and Client Secret are required.

GitHub Authentication
To set up GitHub as an authentication provider:
- Visit your GitHub Developer Settings under your profile.
- Select OAuth Apps and create a new OAuth app.
- Enter the following details (replacing
https://hostname:90with your actual Signotaur URL):- Application Name: e.g., "Signotaur"
- Homepage URL: e.g.,
https://hostname:90. - Authorization Callback URL: e.g.,
https://hostname:90/oauth-github.
- Click Register Application and make a copy of the Client ID.
- Click Generate a new client secret and make a copy of the Client Secret.
- Click Enable on the GitHub Authentication form in Signotaur, and copy the Client ID and Client Secret from GitHub and paste them into the corresponding fields.
- Click Update to save the GitHub authentication settings.
Google Authentication
To set up Google as an authentication provider:
- Go to the Google APIs Console.
- Create or select a Google APIs project, then navigate to Credentials.
- Click Create Credentials and select OAuth client ID.
- For Application type, choose "Web application" and enter the following (replacing
https://hostname:90with your actual Signotaur URL):- Name: e.g., "Signotaur Server".
- Authorized JavaScript Origins: e.g.,
https://hostname:90. - Authorized Redirect URIs: e.g.,
https://hostname:90/oauth-google.
- Click Create and make a copy of the Client ID and Client Secret.
- Click Enable on the Google Authentication form in Signotaur, and copy the Client ID and Client Secret from Google and paste them into the corresponding fields.
- Click Update to save the Google authentication settings.
Note that changes to external authentication require restarting the Signotaur service to take effect.