Users
The Users page in the Admin section of Signotaur allows administrators to manage user accounts, including creating, editing, deleting, and assigning certificates.
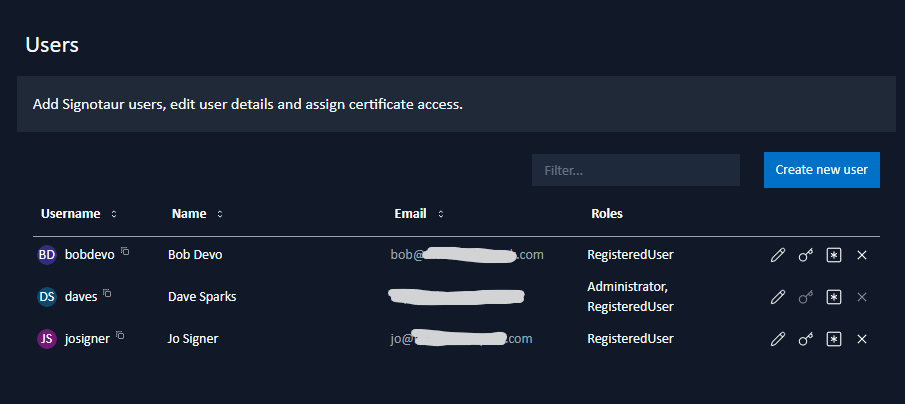
A sortable, filterable table displays all users, and can be searched by username, email, or display name.
Adding a New User
To add a new user, click the Create new user button. A dialog will appear where you can enter the following details:
- Username
- Display name
- Email address
- Administrator: Check this option to grant the user full access to all pages in the Admin section and all registered certificates.
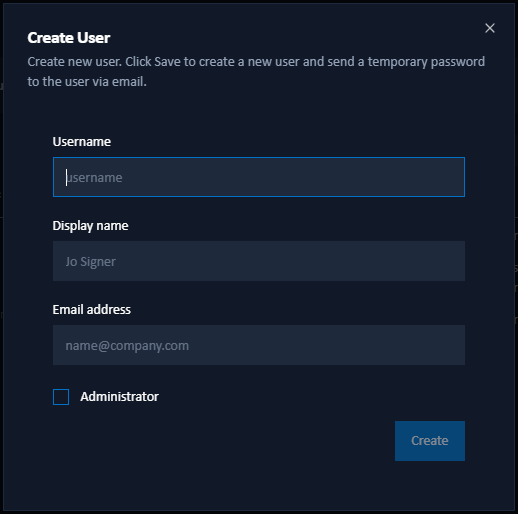
After clicking Create, the user will be created with a temporary password. If an email service is configured, the username and temporary password will be sent to the specified email address, along with a link to verify the email address. The temporary password will also be displayed for manual sharing.
Note: The new user must log in and change their password within 12 hours to prevent expiration of the temporary password.
Editing User Details
To modify a user's details, click the Edit users details button next to their entry. This will open a dialog where you can update:
- Display name
- Email address
- Enabled: Enable or disable the user, as needed.
- Administrator: Modify the user's role as required.
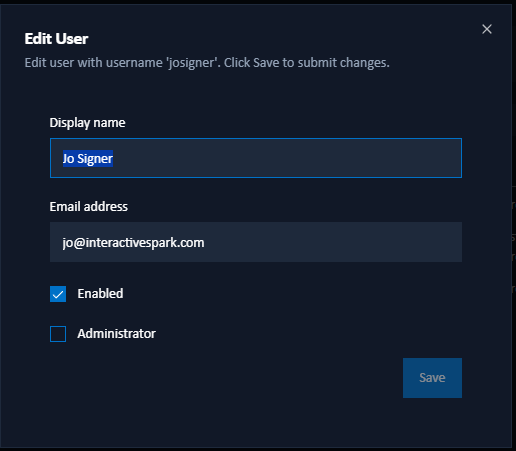
Disabled users will be unable to log in or use their API keys for signing operations. Click Save to apply your changes.
Assigning Certificate Access
To assign certificates to a user, click the Manage certificate access button next to their entry.
A dialog will open, featuring a dropdown list of available certificate aliases and subjects. Select one or more certificates to assign, and click Save.
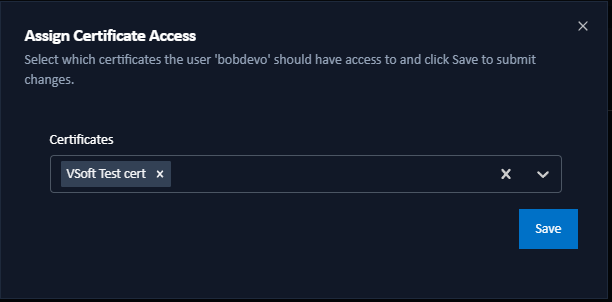
Note: This button is only enabled for non-admin users who can only sign files using certificates that are specifically assigned to them.
Managing API Keys
To manage a user's API keys, click the Manage API Keys button next to their entry.

A dialog will open displaying all API keys for the user:
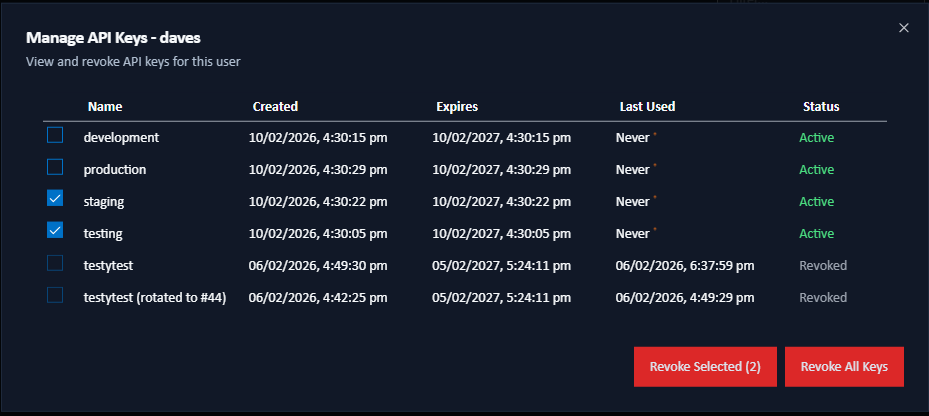
API Key Table Columns
- Name: Descriptive name for the API key
- Created: When the key was created
- Expires: Key expiration date
- Last Used: Last time the key was used for signing (if ever)
- Status: Whether the key is currently Active, Expired or Revoked.
Revoking API Keys
Click the checkboxes next to the API keys to revoke then click the Revoke Select button to immediately disable the selected keys. Click the Revoke All Keys button to immediately disable all the user's keys. Revoked keys cannot be used for signing operations but remain visible in the list for audit purposes. Users can delete their own API keys on the profile.
Note: Revocation is permanent and cannot be undone. You must create a new API key if needed.
For comprehensive information about API key lifecycle and rotation strategies, see API Key Lifecycle. For CLI-specific workflows, see API Key Management.
Resetting a User's Password
To reset a user's password, click the Reset Password button next to their entry. A confirmation dialog will appear. Click Continue to proceed with the reset, which will trigger an email to the user with a password reset link.
Note: This will require that the email service is configured.
Deleting a User
To remove a user from the system, click the Delete button next to their entry. Confirm the deletion to permanently remove the user.