Unit Tests
Before reading this page, it is highly recommended you read the builds page.
What is the Unit Tests Page?
The Unit Tests page allows you to see the results of any Testing Actions that were completed during the build. The Unit Tests page can be located by viewing an individual build. Once unit tests have been added to a stage, all results for those tests can be found on this page.
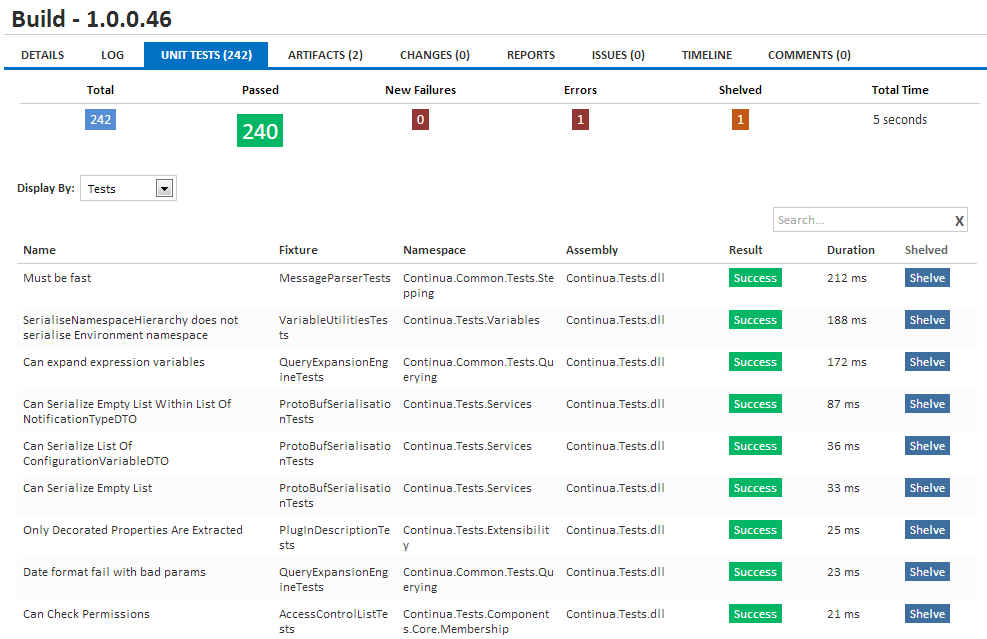
The Unit Tests page is broken up into two sections (Unit Tests page is shown below). At the top of the page is a summary of all your tests which displays how many tests completed successfully, failed etc. Below the summary is a full list of every test including how long the test took to run, the test result, etc.

Note that for running builds, unit tests are not finalised until the current stage has completed. Be sure to refresh the page once the build has completed to get an accurate representation of unit tests in the result header.
Unit Tests Summary
The results of all unit tests are grouped into several categories and these categories are displayed in the Unit Tests Summary at the top of the Unit Tests page. All categories (except New Failures) will only be shown if you have at least one test that falls into that category. For example if all of your tests succeeded you will not see the Errors category in the Unit Tests Summary.
Each category in the summary can be clicked which will filter the table below it to only show tests in that category.
The complete list of test result headers are:
Total, Passed, Fixed, Failed, New Failures, Error, Inconclusive, Not Run and Shelved.
Display By Tests
All unit tests can be displayed individually by selecting Tests in the Display By dropdown. By displaying the individual tests, you can drill down and check why a certain test failed by clicking the test's name. If this test has failed previously then the error message will include a link to the build where this build first failed.
When displaying by tests, all columns are sortable but only name, fixture, namespace and assembly are taken into account when the search feature is used.
Display By Fixture/Namespace/Assembly
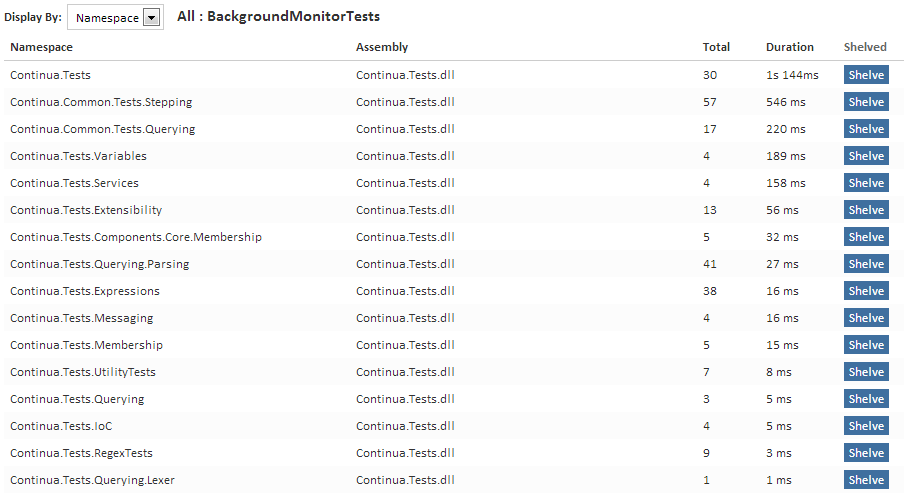
Unit tests can be grouped and viewed by the assembly, namespace or fixture. When grouping, test results are not shown. The information displayed when grouping includes the total amount of time it took to run every test in that group and the total number of tests in that group.
If your tests are grouped and you shelve a group, you will be shelving every test within that group. See the Shelving section below for more information.

Shelving Tests
Unit tests can be shelved so that their results are ignored the next time a test is executed. This is useful when you have conditions on your stages that stop the build when there are failed tests. All shelved tests are ignored by the build process so any shelved tests that fail will not count towards your failed builds. You can choose to shelve a test, an entire fixture and.or an entire namespace. When shelving a test, you can specify whether the tests should be shelved for just this configuration or for every configuration in the current project.
Shelving Individual Tests
Individual tests can be shelved by selecting Display By Tests and clicking the shelve button next to the test you want to shelve. This will only shelve a single test.
Shelving Entire Fixtures, Namespace and Assemblies
Entire fixtures, namespace and assemblies can also be shelved. If you select fixture, namespace or assembly in the Display by dropdown, you can shelve an entire group by clicking Shelve. For example, if you Display by Namespace, clicking shelve next to the appropriate namespace will shelve every test in that namespace.
Shelving Dialog

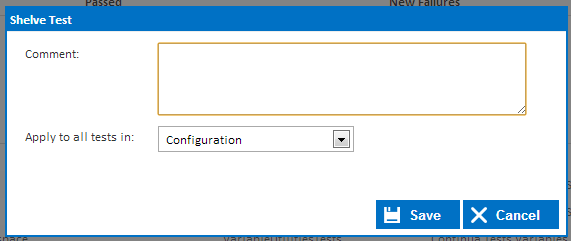
When you shelve a test, the Shelve Test dialog will appear with the following properties:
Comment
The comment allows you to associate any additional information when shelving a test.
Apply to all tests in
This property allows you to set whether this test should be shelved for just the current configuration or for all configurations in the current project.
Unshelving Tests
All tests, fixtures, namespaces and assemblies can be unshelved by clicking the unshelve button next to the appropriate tests.
Continua allows you to shelve Fixture/Namespaces but that translates into shelving all tests underneath them. If a test has been shelved via its fixture or namespace then unshelving the test will unshelve all tests in that fixture/namespace. For example, if you're viewing tests via the test view and they've all been shelved as a result of their fixture being shelved then you'll get a pop up warning you of what the action of unshelving will do. In the following scenario, a fixture has been shelved and we're trying to unshelve an individual test in that fixture.
I just shelved a single test and it shelved more than one
A test is identified by its Assembly, Namespace, Fixture and Test Name. When using some unit test applications like NUnit, it's possible for a test fixture to have multiple tests executed with the same test name. In Continua, they'll show up as separate tests but will all be treated as the same test when shelving. This means shelving a test that has multiple tests with the same name will also shelve those. Don't be alarmed when you shelve a test that has 10 other tests with the same name in the same fixture and see all of those 10 tests shelved as well.