Users
The Users page in the Admin section of Signotaur allows administrators to manage user accounts, including creating, editing, deleting, and assigning certificates.
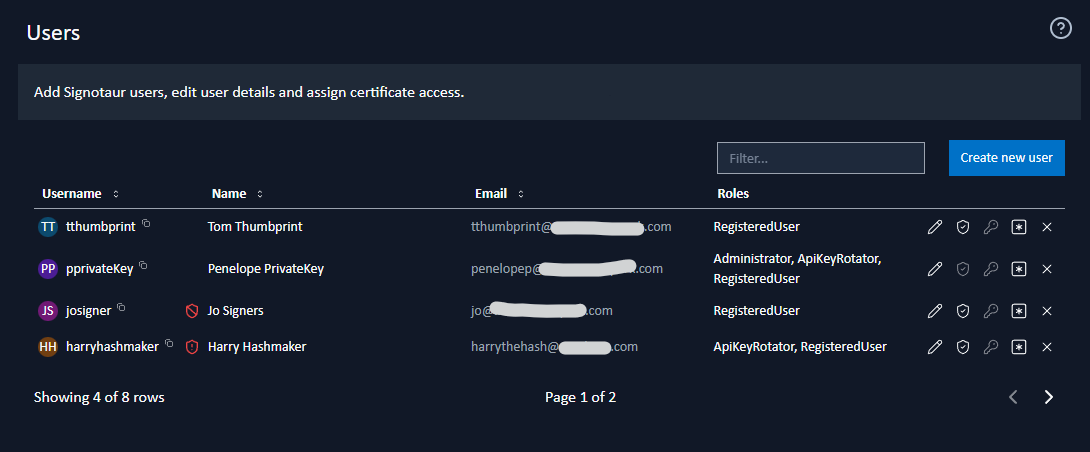
A sortable, filterable table displays all users, and can be searched by username, email, or display name.
Adding a New User
To add a new user, click the Create new user button. A dialog will appear where you can enter the following details:
- Username
- Display name
- Email address
- Administrator: Check this option to grant the user full access to all pages in the Admin section and all registered certificates.
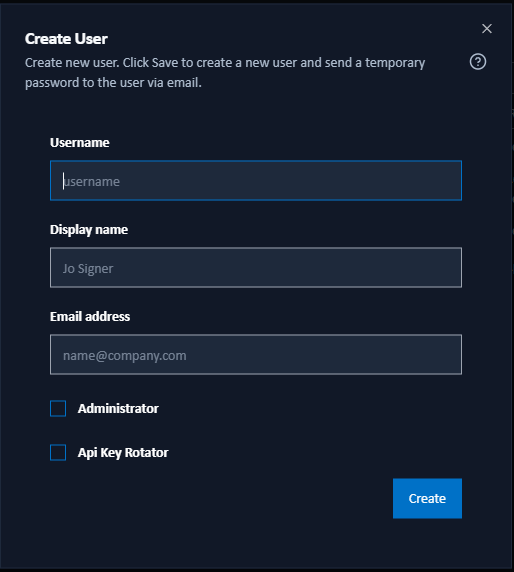
After clicking Create, the user will be created with a temporary password of 20 characters. If an email service is configured, the username and temporary password will be sent to the specified email address, along with a link to verify the email address. The temporary password will also be displayed for manual sharing.
Note: The new user must log in and change their password within 12 hours to prevent expiration of the temporary password.
Approving Account Requests
When someone signs in with Google or GitHub and has no account, Signotaur creates a request rather than an account. The administrators are emailed a link to this page.
A Pending registrations toggle appears above the table whenever anything is waiting, with the number of requests beside it. Turn it on to list only those requests. A pending user also shows a clock icon next to its name and cannot sign in yet.
To act on a request:
- Click the Approve this registration button next to the entry.
- Read who asked and which email address they gave.
- Click Approve to allow them in, or Reject to refuse the request and delete the account. Cancel leaves it pending.
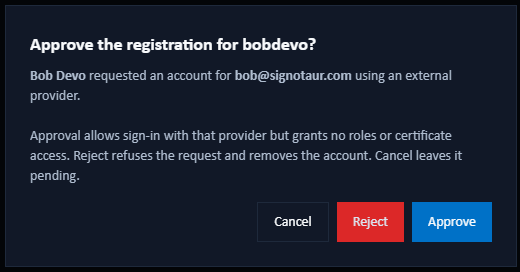
Approval lets the person sign in with the provider they registered with. The approved user is emailed. If that message cannot be sent, the approval still stands and you are told why it failed.
Editing User Details
To modify a user, click Edit user details next to their entry. This will open a dialog where you can update:
- Display name
- Email address
- Enabled: Enable or disable the account. Re-enabling a locked account also clears the lockout and resets its failed sign-in count.
- Administrator: Grant or remove administrator access.
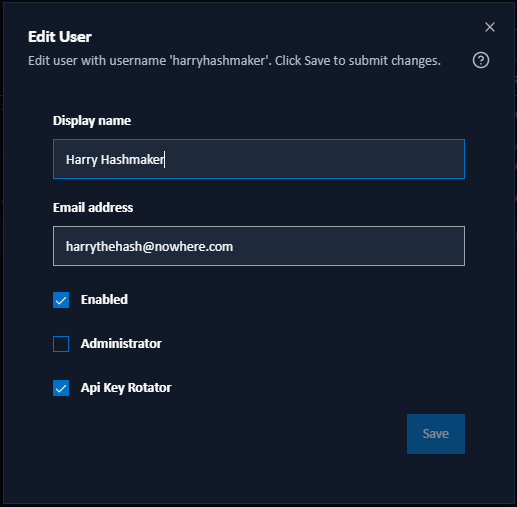
Changing the email address marks the new address as unverified and sends a verification message to it.
Disabled users cannot sign in or use their API keys for signing operations. Click Save to apply your changes.
See Web Interface Security for more about account lockouts.
Resending a Verification Email
An address that has not been verified is shown in grey with no tick, and a Resend the verification email button appears beside it. Click it and confirm to send the message again.
Assigning Certificate Access
To assign certificates to a user, click the Manage certificate access button next to their entry.
A dialog will open, featuring a dropdown list of available certificate aliases and subjects. Select one or more certificates to assign, and click Save.
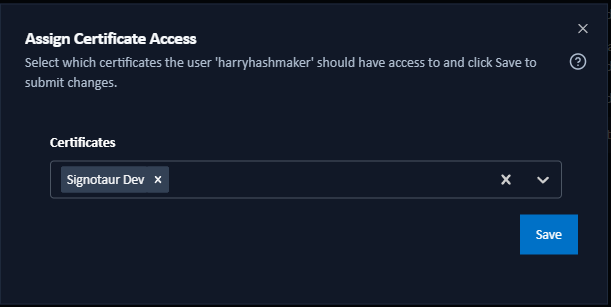
Note: This button is only enabled for non-admin users who can only sign files using certificates that are specifically assigned to them.
Managing API Keys
To manage a user's API keys, click the Manage API Keys button next to their entry.

A dialog will open displaying all API keys for the user:
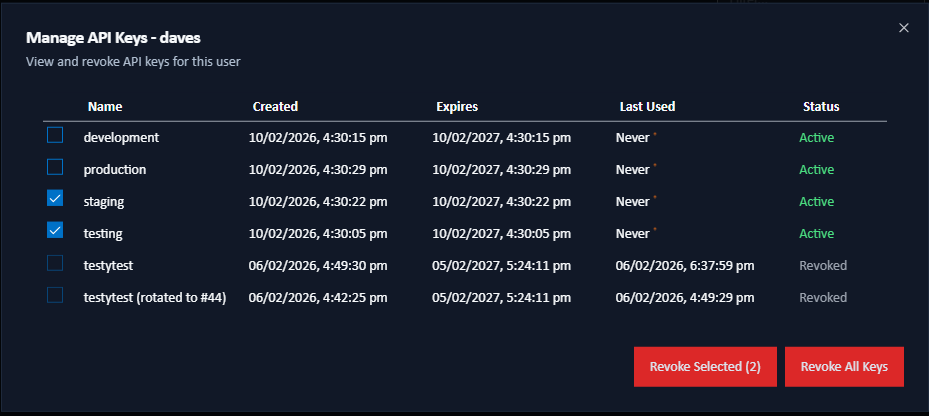
API Key Table Columns
- Name: Descriptive name for the API key
- Created: When the key was created
- Expires: Key expiration date
- Last Used: Last time the key was used for signing (if ever)
- Status: Whether the key is currently Active, Expired or Revoked.
Revoking API Keys
Click the checkboxes next to the API keys to revoke then click the Revoke selected button to immediately disable the selected keys. Click the Revoke All Keys button to immediately disable all the user's keys. Revoked keys cannot be used for signing operations but remain visible in the list for audit purposes. Users can delete their own API keys on the profile.
Note: Revocation is permanent and cannot be undone. You must create a new API key if needed.
For comprehensive information about API key lifecycle and rotation strategies, see API Key Lifecycle. For CLI-specific workflows, see API Key Management.
Resetting a User's Password
To reset a user's password, click the Reset Password button next to their entry. A confirmation dialog will appear. Click Continue to proceed with the reset, which will trigger an email to the user with a password reset link.
Note: This will require that the email service is configured.
The button is disabled for an account that signs in only through Google or GitHub, because there is no password to reset. If the account holder wants one, they set it themselves under Profile, Change Password.
Deleting a User
To remove a user from the system, click the Delete button next to their entry. Confirm the deletion to permanently remove the user.
Rejecting an account request does the same thing: the account is deleted, and the person may request one again.