Code Signing Certificates
The Certificates page in the Admin section of Signotaur allows administrators to manage certificates used by the Signotaur client for code-signing.
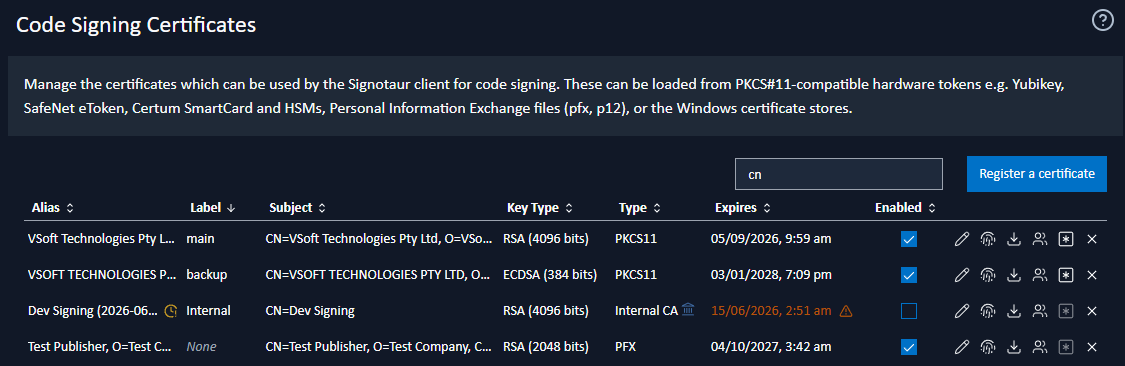
A sortable, filterable table displays all registered code-signing certificates and can be searched by alias, label, or subject.
Certificate Table Columns
- Alias: Auto-generated descriptive name for the certificate (e.g., "CodeSigningCert (2027-12-31)"). An amber clock icon next to the alias marks a replaced registration; see Replaced Certificates below.
- Label: User-defined simple identifier for CLI certificate selection (e.g., "production", "test") - see Certificate Selection below
- Subject: Certificate subject distinguished name
- Key Type: The certificate's public-key algorithm and size (e.g.
RSA (2048 bits),ECDSA (256 bits)). - Type: The certificate source. A certificate that Signotaur issued through its certificate management system shows Managed (Internal CA) or Managed (ADCS) with a landmark icon; these certificates are renewed automatically before expiry.
- Expires: Certificate expiration date
- Enabled: Whether the certificate is available for signing operations
- Actions: Available operations for the certificate
For background on code-signing certificates (accepted certificate types, supported public-key algorithms and key sizes, minimum RSA key size for publicly-trusted certificates, and the certificate sources Signotaur supports) see Code Signing Certificates.
Adding a New Certificate
To add a certificate, click Register a certificate. A dialog will open where you can enter certificate details.
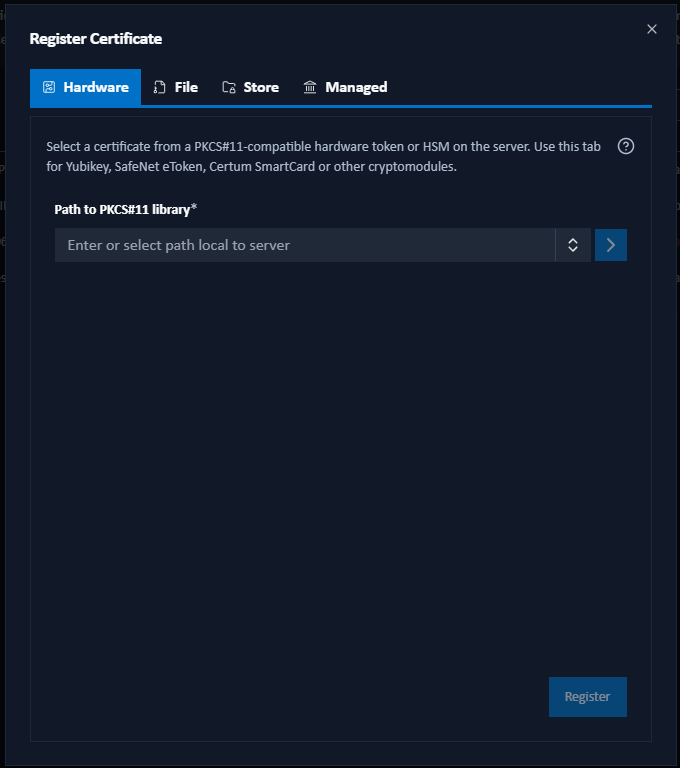
Signotaur supports four certificate sources, each accessible via its own tab:
- Hardware: Loaded from a server hardware token or HSM via PKCS#11, a cryptographic token interface standard.
- File: Uploaded PFX (Personal Information Exchange) files containing certificates and private keys.
- Store: Certificates stored in the Windows Certificate Store.
- Managed: Code-signing certificates that Signotaur has already issued through its certificate management system (Internal CA or ADCS). These certificates are renewed automatically. The tab is shown only when certificate management is enabled.
Click each heading for more details on adding each certificate type.
The Managed tab requires an Enterprise license. Without one the tab is still shown but disabled. Add one on the Licenses page to use this tab." The File, Store, and Hardware tabs stay enabled in every edition. See Editions & Licensing.
Replaced Certificates
A registered code-signing certificate is replaced when the managed certificate behind it has been renewed and a newer certificate has taken its place. A replaced registration is marked with an amber clock icon in the Alias column; the tooltip names the replacement and, when auto-unregister is enabled, the date the old registration will be automatically disabled or removed.
Editing a Certificate
 To edit a certificate's alias or label, click the Edit button next to the certificate entry.
In the dialog which opens, you can modify:
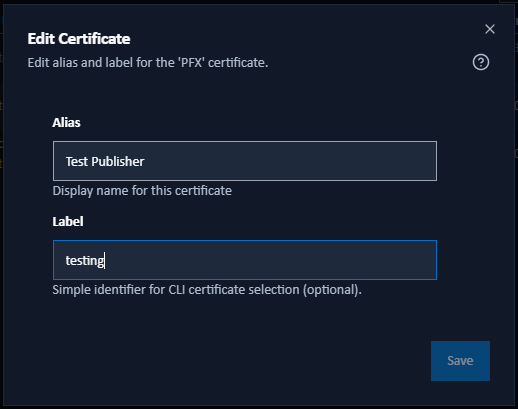
- Alias: The descriptive display name for the certificate. Must be unique across all certificates.
- Label: An optional, simple identifier for CLI certificate selection. Multiple certificates can share the same label (useful for certificate renewal workflows).
Label Duplication Warnings
When editing a certificate's label, the dialog displays warnings if other certificates share the same label:
- Orange Warning (⚠️): Multiple non-expired certificates share this label. This may cause ambiguity during CLI certificate selection - the certificate with the latest expiration date will be automatically selected.
- Gray Warning: Only expired certificates share this label (no selection conflict).
Note: Label matching is case-insensitive ("Production" matches "production").
Certificate Selection via Labels
Labels provide a user-friendly way to select certificates in the SignotaurTool CLI without needing to update scripts when renewing certificates.
Benefits:
- Simplified CI/CD: Use
--label productioninstead of updating thumbprints after renewal - Automatic Selection: When multiple non-expired certificates share a label, the one with the latest expiration is automatically selected
- Seamless Renewal: Assign the same label to your new certificate, and existing scripts continue to work
Example Workflow:
- Current certificate has label "production", expires 2025-12-31
- Obtain renewal certificate, expires 2027-12-31
- Add renewal certificate to Signotaur with label "production"
- Both certificates are now available (overlap period for testing)
- After expiration of old certificate, new certificate is automatically used
- No changes needed to CI/CD scripts using
--label production
See Sign Command - Certificate Selection for CLI usage.
Enabling/Disabling a Certificate
To enable or disable a certificate for signing, toggle the checkbox in the Enabled column of the certificates table.
Viewing a Thumbprint
 To view a certificate's thumbprint, click the Show Thumbprint button next to its entry. A dialog will open where you can view and copy the thumbprint.
Downloading the Public Certificate
 To download the certificate's public key, click the Download button next to its entry. The Download Certificate dialog opens and lists every element of the certificate's chain: the leaf certificate, each intermediate CA (numbered Intermediate CA, Intermediate CA 2… when more than one is present), and the root CA. Each element has its own card showing the subject, thumbprint, and expiry, with two download buttons: Download .cer (DER) and Download .crt (PEM).
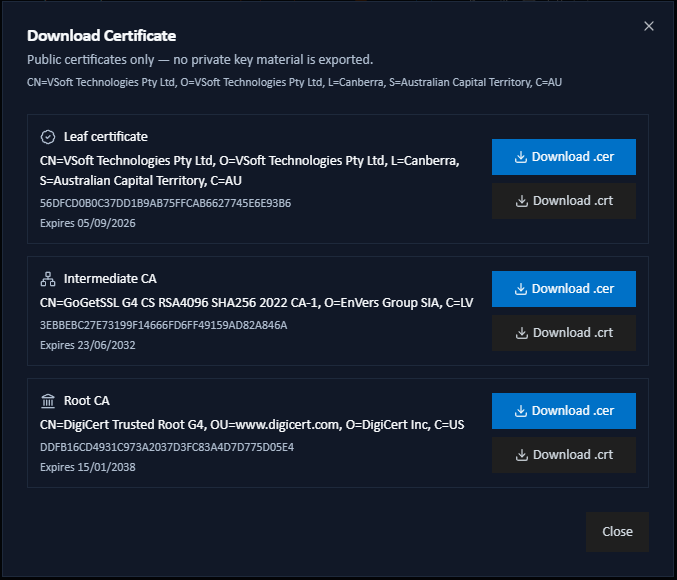
- The downloaded file contains the public certificate only; no private key material is ever exported.
- Use
.cer(binary DER) when the consuming tool expects the Windows-native form: Windows certificate-import dialogs, AppLocker publisher rules, and package registries such as nuget.org for publisher-key registration. Use.crt(base64 PEM) for text-friendly tools, OpenSSL pipelines, and Linux trust stores. Both files contain the same public certificate; the difference is the encoding. - If the chain can't be fully assembled on the server (for example, the cert's issuer is not installed locally), the dialog still renders the certificates it could resolve and shows a small note explaining the gap.
For platform-specific guidance on installing a root certificate as a trust anchor, see Trust Distribution.
Assigning User Access
 To assign certificates to users, click the Assign User Access button next to the certificate entry.
In the dialog which opens, use the dropdown to select one or more non-admin users to assign the certificate to, then click Save.
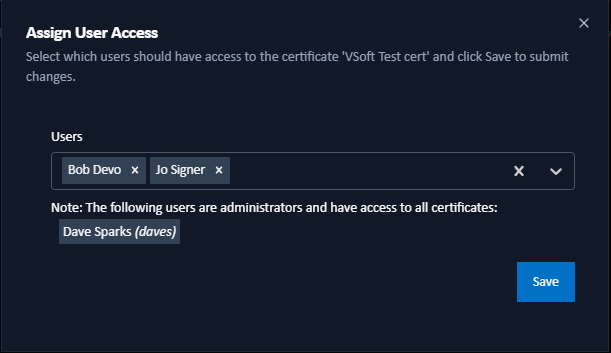
Note: Only non-admin users can be assigned this way, as admin users automatically have access to all certificates.
Updating the Password
 PKCS#11 certificate passwords can expire. To update the registered password for a certificate, click the Update Password button next to the certificate entry.
In the dialog which opens, enter the password and a password confirmation, then click Save.
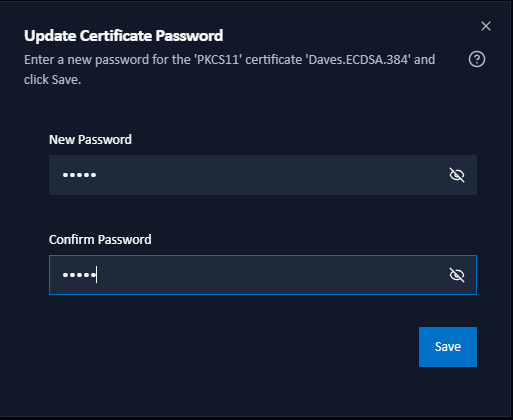
Note: Passwords can only be updated for PKCS#11 certificates.
Deleting a Certificate
 To delete a certificate, click the Delete button next to its entry, then confirm to permanently remove it.